Alkmaar, Netherlands. November 2021. The base.
I followed the same method as I used with Mischa's U-Boat build but this time tried not to miss one of the steps in the process.
The foam piece I had was already a good size for the diorama I had envisioned. My first task was to carefully mark the position of the u-boat and cut out where it should go. Since this was a full model of a submarine, I could now have it coming out of the water if I wanted. I di want so that is how I cut the foam.
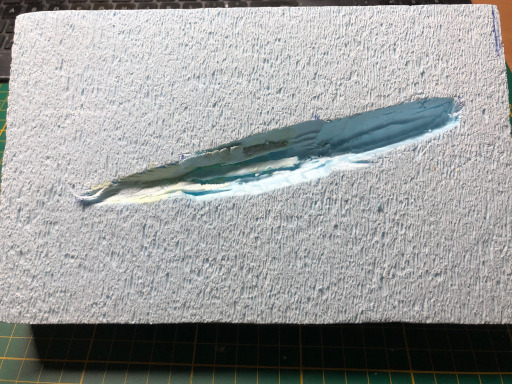
Shape roughly cut out of the foam.
Of course, things don't go according to plan whenever I'm involved and this was no different. I spent ages trying to carefully fit the u-boat into the hole, trimming the sides here and there, being careful when placing the model in the gap. It was some time before I realised that the propeller shafts and propellers on the model will not be seen and could therefore be removed. Once I'd ripped off the offending items, the model fit nice and snug into the gap.
The next stage is to apply the scrunched up tin foil to the base with PVA glue. The part of the process I missed last time was to also put the scrunched up tin foil at the sides of the gap for the u-boat so that the sea was close to the model. This meant constantly placing the model in its position and filling any obvious and visible gaps with tin foil. Oh yes, and trying not to stick the tin foil to the model or move the already placed pieces of tin foil when continuously placing and removing the model.
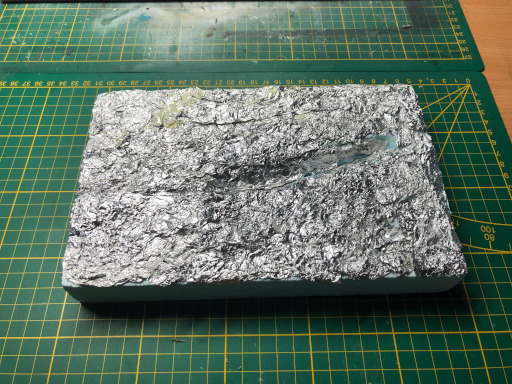
The scrunched up tin foil now covers the base and any gaps for the u-boat.
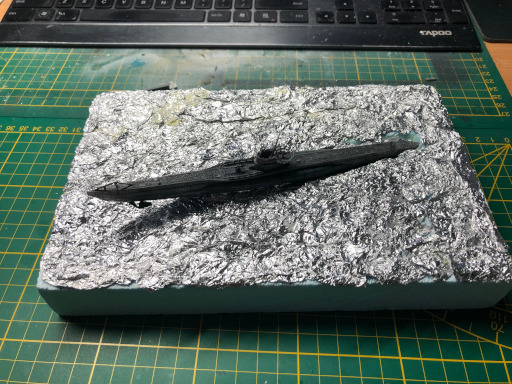
The constant placing of the model ensures (hopefully) a good fit

Rising out of the water at an angle ... that's dramatic
Once the scrunched tin foil had dried in place the next step was to glue a layer of tin foil over the whole base, pressing it down into all the crevices and also the gap where the u-boat will be placed. I also allowed the piece to fit around the sides of the foam as I wasn't sure at this time if they would be visible on the frame.

One-piece to bring them all and on the base to bind them.
After that single piece of tin foil was fixed over the base and dry, it was time to give the whole thing a coat of PVA glue to help smooth out any excessively sharp edges. Unfortunately, it was during this stage that I ran out of my usual PVA glue and found a wood glue that looked the same. Yes, it was white, and yes it spread like PVA. However, it didn't dry as transparent as my old PVA did. This stuff had a faint white sheen to it. I'm hoping that when I prime it with the levelling primer it will still be okay.
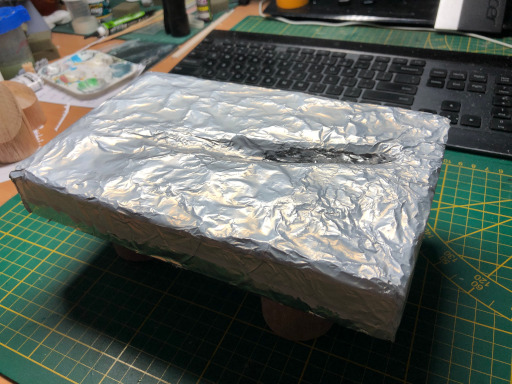
White water it is not supposed to be.
It appears that not only do I not have a photo frame of the right size, but neither does anyone else. The foam base it just a bit too big or a lot too small for the photo frames that are readily available in the shops. So, looks like I'll need to make my own frame once again. Oh joy.